How to Make Your Own Hiking Stick
Walking sticks make hiking more fun. Also called hiking poles or hiking staffs, they let your arms get into the act, so you cover ground more easily. Even better, they help you keep your balance, which means that heavy pack will stay on your back instead of tumbling down some deep ravine — and maybe taking you with it! Here’s how to create your own walking stick or hiking pole.
WHAT YOU’LL NEED:
- A straight tree or tree branch that’s 1-1⁄2 to 2 inches thick at its big end, and 55 to 65 inches long (DO NOT CUT ANY TREE; see Step 1.)
- A 1-inch-long piece of 3⁄4-inch diameter copper water pipe
- Five-minute epoxy glue
- A small saw to trim the stick to its final length
- A sharp pocketknife
- A spokeshave and a wood-burning tool (both optional)
- Adult help and/or supervision
WHAT YOU’LL DO:
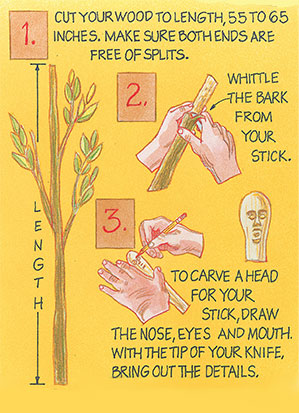 Step 1: Cut your wood to length, making sure both ends are free of splits.
You can use dead, dry wood, but it’s hard to carve and makes a weak walking stick. If possible, use fresh wood; hardwood from deciduous (leafy) trees is better than evergreen softwood because it is less gummy.
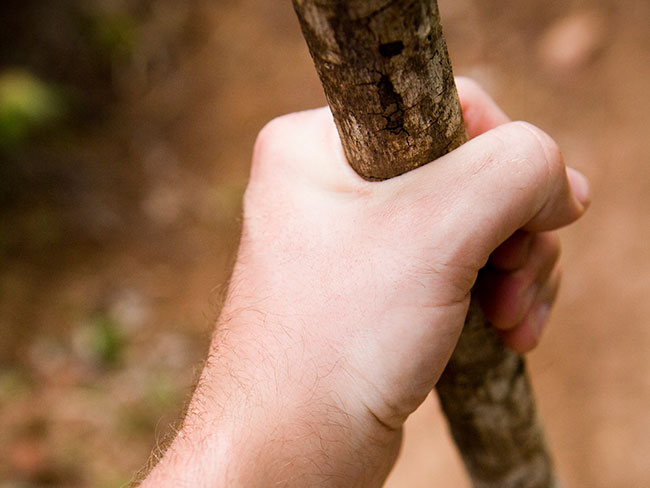
To choose the right size, stand with your arms at your side and the stick should be about 6 or 8 inches taller than your elbow. Pick an even longer stick if you’ll be tackling steep terrain. If you’re really just planning on walking with your stick, a shorter one will do.
Note: Scouts never cut just any live tree! Take wood only from approved sources, such as a conservation project that thins out a timber stand or trail-building and trail-improvement projects.
Step 2: Using your pocketknife, whittle the bark from your stick, revealing the bright wood beneath. This job takes patience, especially when you are working around knots. Keep at it. You may discover your stick has an inner layer of bark, as well. Carve it away too, or your stick will darken as it dries.
Step 3: Now is the time to carve a head for your stick, if you want one. Using a pencil, draw on the nose, eyes and mouth, then slowly and carefully use the tip of your knife to bring out the details. If you rush this part of your work, you risk slipping and cutting yourself.
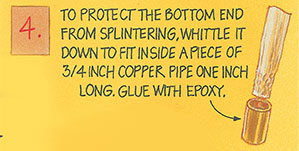 Step 4: To protect the bottom end of your walking stick from splintering, whittle it down until the piece of copper pipe slips snugly onto it. Secure the pipe permanently with five-minute epoxy.
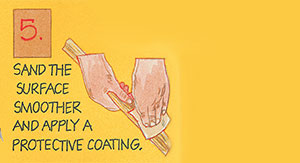 Step 5: Your walking stick is now ready for immediate use. However, if you’d like to carve it to a smoother finish and apply a protective coat, you’ll need to let it dry indoors for about a month. Use sandpaper or a spokeshave (if you have one) to make its surface even smoother.
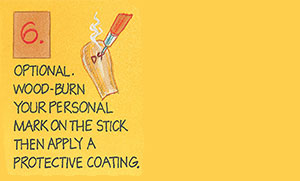 Step 6: Optional: Add your personal mark to the walking stick using a wood-burning tool. When you have the stick carved to your satisfaction, apply a stain or other such finish and a protective coat of polyurethane.
Take your walking stick with you on all your hikes. Whenever you pick it up, the stick will remind you of your past outdoor adventures and make you wonder what excitement lies ahead.
What kind of finish is recommended?
Old used wood garden tools rakes, shovels,hoes.
You buy replacements handles
my hiking stick turned out great!!! it is nice and smooth and i didnt need to sand it. under the bark there were some cool patterns too. no…. not worm marks. thank you boys life!
Great instructions, thanks! Still not sure exactly what type of wood i should use. What about a limb from a Mimosa tree?
I would suggest not removing the bark until the wood is dry. I’ve had many a peeled pole crack and split as it was drying without the bark on to keep it sound.
I live in a place where bamboo is all over it grows very quickly and makes a decent tough stick
A copper tip makes no sense to me because it could slide over a rock, especially a rock under water, and cause the traveler to lose their balance and fall.
I would not recommend a copper cover on the bottom because it could slide when walking in a rock bed, concrete or mountain trail with rocks.
The copper piece is not a cap, but, rather a sleeve. The bottom, or striking area, of the pole is still wood. The ring of metal just keeps the bottom of the staff from splitting apart.
What YEAR IS IT?
the copper is so you don’t damage the end of the staff it dose not cover the end of the wood its just around the end of the wood
How do you treat your stick if it has bug holes.
Lolol
you can fill the holes with wood putty, push in real hard, then sand it lightly.
I didn’t read the other comments but I have used wooden closet rod stock from the hardware store. Cheating perhaps but no risk of poison ivy from going off trail. Also many parks have been picked clean from folks gathering firewood. While there grab a rubber cup that one might place on chair leg ends. This way the end is protected and will give grip on hard surfaces.
A nice addition is to wrap the pole with paracord as a grip and also handy if you need cordage on the trail.
Not all of our Bears and Webelos are quit mature to use a knife for whittling. So we use the alterative to a stick from the woods, it is an hardwood mop handle $5 at your local hardware store. Not so easy with using a wood burning tool but in do time it works. Markings from bottom up every 6″ mark the stick. Good to use for depths of water, length of fish and so much more.
Good article, thanks.
Use parachute cord to make a grip. What i did for my stick was take about 2 yards and wrapped the handle where I hold it in a samurai style, using a SMALL amount of glue to hold each end down. This way, not only do you add a nice style, but in an emergency you can pull off the cord and use it. (I used 300 pound rated parachute cord)
With knee surgeries coming, and two hips that have only enjoyed 6 years of my last 60, I need to be a bit careful. My DIY walking staff project will be a success thx to the comments and info received today.
…… til later – 😉
Around the upper area, where you would be gripping the stick, you can wrap 5/50 cording or the like for extra grip in the wet and a cool look as it can come in many colors. Start by trailing an end down from the top and secure it with hot glue or super glue. Then start wrapping from the top of where you want the grip, covering the tail and holding it in place. Then tie it off on the bottom, secure it with a little more hot glue and there you go.
I got my dad to drill a hole on top of the walking stick and a plug with my whistle so it was easy to attach both of them
i just use a pocket knife a lighter a peice of sand paper. then i crate a really nice walking stick.
hospitals often have spare crutch tips (at least mine did) that are easy to use to stop the end of your stick from splitting. Also if you can peel the bark off a sapling instead of cutting, it ads a much smoother look. Hope this helps!
I took my stick to a drugstore and found a crutch tip that fit it perfectly instead of the pipe.
My boys use honeysuckle. It is invasive and branches large enough can be found in surprising places. You might also check with people that have overgrown properties to see if they have any wood you can take.
Thank you my cub has been wanting to make one I just wasn’t sure how. Now we can get started.
I like to do my wood burning at camp with a good magnifying glass. No electricity needed.
If you can’t find the copper pipe a bottle cap can do just fine
I found and whittled a great walking stick at Webelos Woods last year, I havent thought about wood burning yet, though I did carve my intitials into it
A Good wood to use is Willow. However, you can obtain a pretty descend piece of wood from a broom stick.
I suggest not using copper pipe. The hollow end will dig into the soil leaving ugly marks, and isn’t very leave no trace friendly. Instead, use a rubber furniture leg tip. Costs less than a copper pipe piece, and is very low impact on trails.
If using an open ended piece of pipe, make it end flush with the end of the stick and it will not dig in the ground any more than any other end piece. The stick can not split because it is compressed by the pipe.
¿how I can give that curved?
This is a neat article and it got me thinking about making my own walking stick or staff (a staff is bigger)… However, it would have been nice if they specified what kind of wood is good to use. I am using sycamore.
I highly recommend birch.
where could you get the copper pipe?
Hey ctc10, if you go to a hardware store like ACE hardware or Lowe’s, they have copper piping for a couple dollars. Hope that helps!
Pretty much any home improvement store will carry copper pipe. Also keep an eye out for pieces of copper pipe they sell specifically for ending a pipe. They are usually about a foot long and one is closed off in the shape of a cone. This could work better than any old regular piece if pipe because it would not dig into the ground as much and won’t get anything stuck in it.
Use a 3/4″ copper coupling, it’s under $1.00
Or hickory saplings.
This is an awesome project!!! used it to introduce my Wolves to some wood working skills…!!! they and I had a blast making the walking sticks…
INTERESTING
I like to use recycled eucalyptus from our airport perimeter line. Works great! Very strong, and smells good too. Has an attractive grain structure when sanded and finished.
I find that using a 3/4 inch copper pipe cap is better for the end, this completely covers the end as it is only open on the side that attaches to the stick. And if this is too short for your liking, pipe first and then cap.
I get my walking stick basics from the piles of branches when people trim their trees. Free is as cheap as it gets
that’s where I found my stick.
That is awesome! I am going to try it!