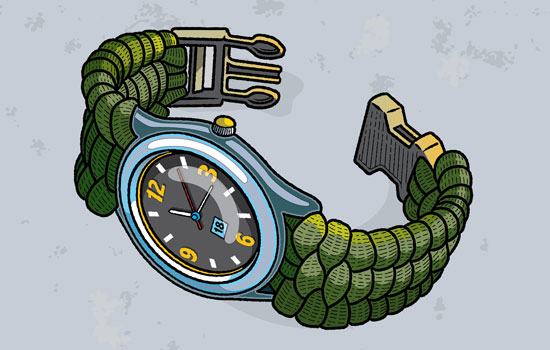
Make a Paracord Watchband or Bracelet
A paracord watchband makes a great gift or can be used as a survival tool. Unraveled, it provides about 10 feet of handy paracord for fixing tent lines or tying together broken gear. You can even use the line inside the cord for fishing line.
WHAT YOU’LL NEED
- About 10′ of 550 paracord (If you’re working on a smaller watch, you can use a smaller buckle and 325 paracord.)
- Watch
- Tape measure
- Scissors
- Lighter
- 5/8″ side-release buckle
- Felt-tipped marker
- Hemostat
WHAT YOU’LL DO
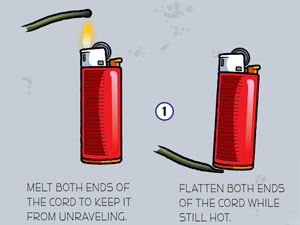
1. Melt both ends of the paracord with the lighter. While they are still hot, carefully flatten both ends with the bottom of the lighter. This will make it easier to pass the cord through the watch or bracelet. The best size watch has about 5/8″ between the lugs (where the pins go).
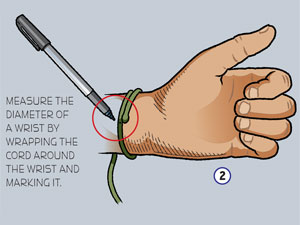
2. Wrap the paracord around a wrist comfortably and mark it. This will be the length of the watchband.
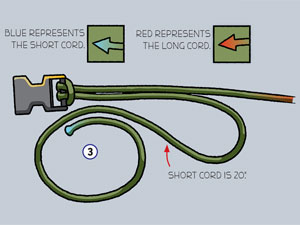
3. Loop the cord through the female end of the buckle and draw tight. You should have 20″ of cord on the short end. The long end is your working end.
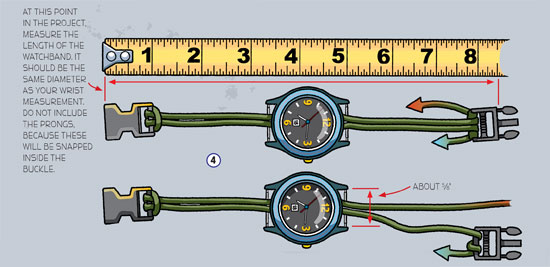
4. Pass both cords though the pins and under the watch. Loop both ends twice around the male end of the buckle. Make any adjustments in the length of the band to match the wrist measurement. The band will stretch about another inch after completion because of the tightening and pulling on the wrapped cord, making for a comfortable fit.
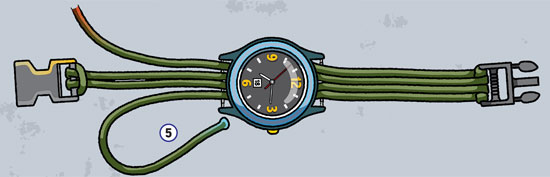
5. Pass the long and short codes back through the pins and under the watch.
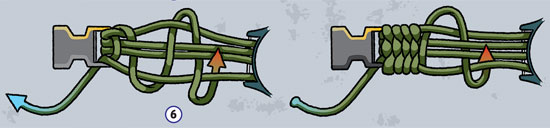
6. Begin to wrap the long end of the cord as shown. Push and tighten the wraps as you go along.
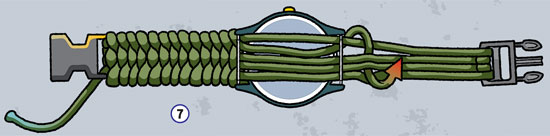
7. When you reach the watch and your wraps are tight, pass the cord through the pins and under the watch. Continue wrapping and tightening the paracord until you reach the male end of the buckle.
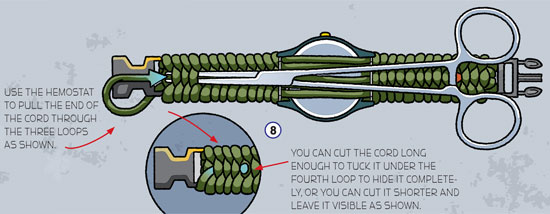
8. Using the hemostat, reach under three loops of cord, grab the end of the remaining cord and pull the cord underneath the three loops. The cord that you just pulled through should then be cut close and melted flat. Leave enough cord to hide it under the fourth loop. Do this for both the male and female ends.
9. Your paracord watchband is now complete.
PHOTOS OF COMPLETED PROJECT
Check out these photos of the completed project sent to us by Boys’ Life readers. If you have a photos of a BL Workshop project, please use the form below to send them to us.

Leave a Reply to Anonymous Cancel reply