How to Build a Survival Shelter
Being a “survivor” has captured the imagination of millions of TV watchers. But a survivor is much more than a TV fantasy. A survivor is someone prepared to live—and live as healthfully as possible—when life far from home doesn’t go exactly as planned.
Being prepared to survive in the outdoors starts with knowing what to be prepared for. You can live days without water and weeks without food. People who don’t survive in the outdoors most often die from losing their body heat, not necessarily from starvation or dehydration. You need to be able to start a fire. And perhaps most importantly, you need to be able to build a shelter to stave off wind, rain and snow, and to keep your body heat trapped where it belongs: near your body.
Here are the keys to taking shelter in the wilderness:
DRESS WISELY
Your first line of defense against the elements is the “shelter” you choose to wear. If you wear layers of synthetic material or wool, and carry a shell of windproof, waterproof material, you are ready for anything. You’ll trap your body heat instead of expending it on the outside world.
THE RIGHT SPOT
Choosing the best place to build a survival shelter is important. It should be in the driest spot you can find. Nothing sucks out body heat faster than wetness. If it isn’t too cold, build a shelter on high ground. Breezes will help keep the bugs away, and you’ll be easier to see if a search party passes nearby. If a cold wind is blowing, choose a spot sheltered by trees. But don’t build in the bottom of deep valleys or ravines where cold air settles at night.
THE COCOON
If it’s almost dark and you can hurriedly collect dry debris (leaves, pine needles, bark) from the forest floor, make a pile two or three feet high and longer than you are tall. When you burrow into the pile, you are in a natural sleeping bag that protects against heat loss.
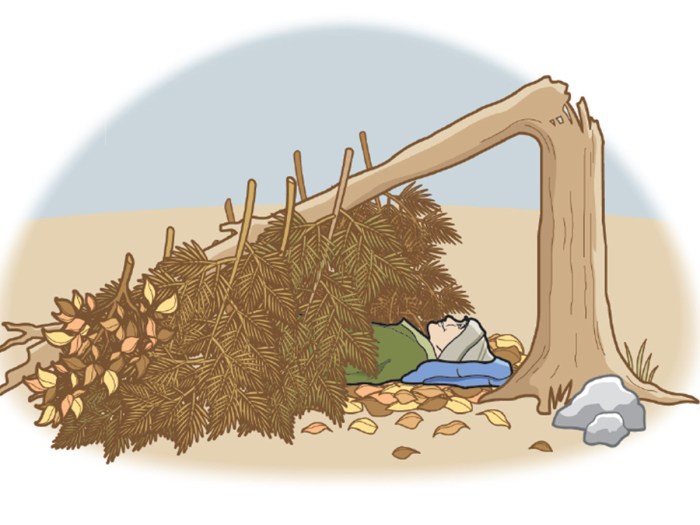
THE FALLEN TREE
The simplest shelter is a fallen tree that has enough room under it for you to crawl in. Lean branches against the windward side of the tree (so the wind is blowing into it and not against it) to make a wall. Make the wall thick enough to keep out wind. If you can build a fire on the open side of your shelter, the heat will help keep you warm.
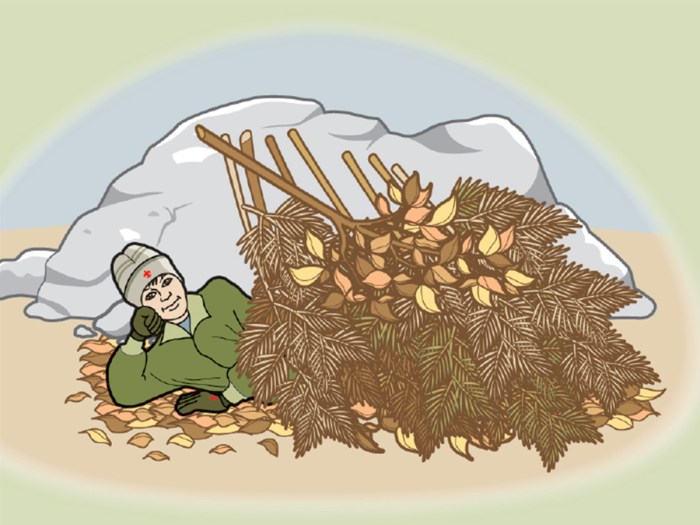
THE LEAN-TO
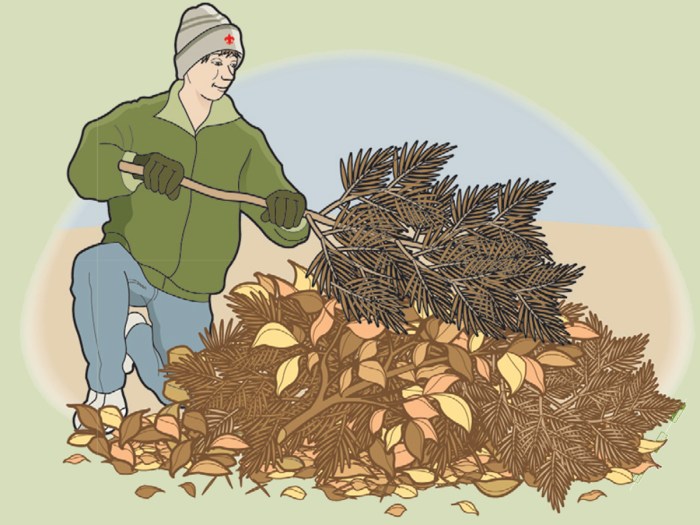
If you find a fallen tree without enough room under it, or a rock or a small overhang, you can build a simple lean-to. Start by leaning fallen limbs against the object, such as the top edge of an overhang, to create a wall. Lean the limbs at an angle to help shield rain. Cover the leaning limbs with leaves, boughs, pine needles, bark or whatever the forest offers. When you have built a thick wall, you can crawl underneath into your shelter. Remember to make your shelter no bigger than you need to fit you and anybody else with you. The bigger the space, the harder it is to keep warm.
You can also build a lean-to by placing one end of a long stick across a low limb of a tree and propping up the other end of the stick with two more sticks. Tie the ends of the sticks together with your boot laces or belt. Lean more sticks against the horizontal stick. Then pile leaves and other forest debris against the leaning sticks until you have a wall. Once again, a fire on the open side of the lean-to will add much heat to your “room.”
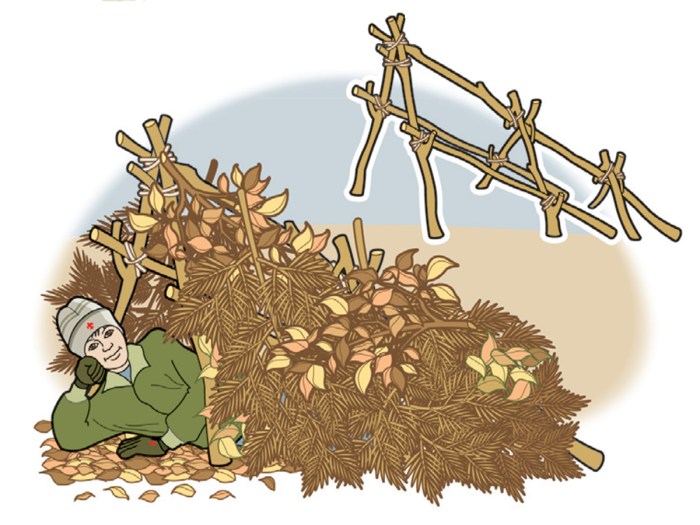
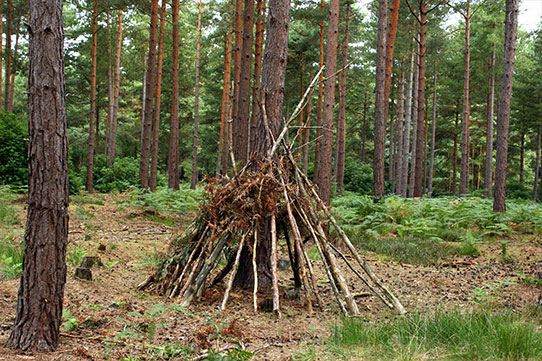
THE A-FRAME
If you can’t make a lean-to, you can make an A-frame shelter. You’ll need two sticks four or five feet long and one stick 10 to 12 feet long. Prop the two shorter sticks up in the shape of the letter A. Prop the longer stick up at the top of the A. Tie the three sticks together where they meet. The three sticks will be in the shape of an A-frame tent with one end collapsed against the ground. Now prop up more sticks against the longer stick, and pile forest debris against the sticks until you have an insulated shelter open at the high end.
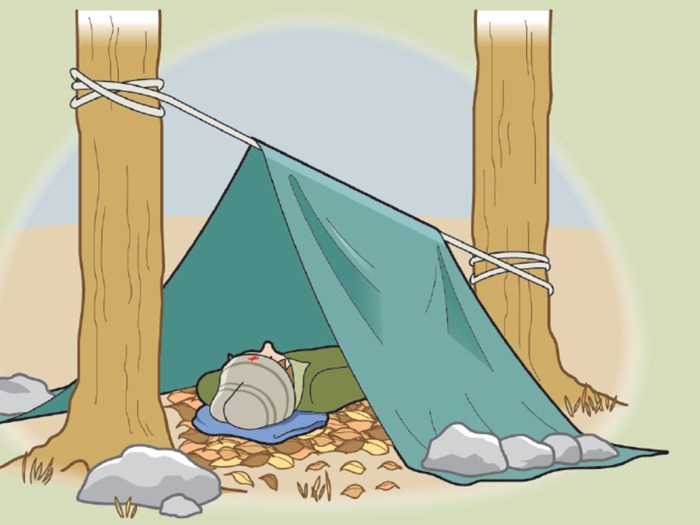
A TARP
When you have a tarp, sheet of plastic or Space Blanket with you, and some rope or cord, tie a line between two trees. Tie it low to the ground with just enough room for you to lie beneath. Stretch the tarp over the line. Place large rocks or logs on the ends of the tarp to hold it in place with the edges close to the ground. If it’s snowing, tie the line off higher on the trees. Steeper walls will shed snow better. Now you have an emergency tent.
YOUR BED
Your shelter is not complete until you have made a bed to lie in. Dry leaves work well. Make your bed a little bigger than the space your body covers and at least eight inches thick. When you snuggle into it, you are ready for the unexpected night out.
BAD PLACES TO BUILD A SHELTER
1. Anywhere the ground is damp.
2. On mountaintops and open ridges where you are exposed to cold wind.
3. In the bottom of narrow valleys where cold collects at night.
4. Ravines or washes where water runs when it rains.
this is great I had to do an essay very helpful
Nice! This is really helpful
yes i built the A -frame one and hang out in it a lot thanks
cool
helpful for boy scouts who are going on wilderness survival camp out’s.
Will this help for the wilderness survival merit badge?
i can make 1 out of a trash bag and sticks
yes I think so
Hard to clearly understand
I’m teaching survival skills to a group of girls 8-12. Thanks for the excellent ideas.
Great! Now i can make a shelter if necessary
very helpful you can put your treking poles in the ground and tie a string to one to another then put a tarp over
thanks helps me alot
thanks for the info!!!
thanks, great for my project!!!
Not helpful.Rubbish.
Now I won’t fail the wilderness survival merit badge.
Now I will not fail my project!!
Ok Now i got Info For my Project
COOL
Brilliant information, cheers!! 🙂
GReat idea my favorite is the double lean-to (A-frame).
Survival campout tough? I may be going on one in January still need to know how to make a good shelter if anyone has any tips for me please reply.
This article has some great advice! Personally, I would make a partial lean-to method. Find two durable trees, lash a strong enough stick to both of the trees and stack sticks on the side. When you are done adding protection (leaves, bark. etc.) it should look kinda like a tent. Sorry for the bad explanation.
cool
I’ve done all of them at a survival campout thing
cool
cool
I’m taking wilderness survival merit badge and i am a star scout and I was wondering if there were any other articles like this
cool
In the “Cocoon” shelter that was discussed… those leaves and pine needles could have ticks! Deer ticks and Wood ticks are the dangerous ticks (there may be others). So, you may want to wear tick repellent.
nice
this is great forsurvial
Carry the…. the old tube tent…. where ever you go. Many uses….
You need to consider that you need to be carefull about the likeliness of shelters collapsing and to leave no trace.:)
Im sorry, but if im out in the middle of nowhere, i wouldn’t be too worried about the whole ” leave no trace ” thing…
I think you should consider the tools needed for the project.Nice tips! 😀
Are there any rules about cutting limbs off trees and or cutting small trees to help make a shelter?
do you think the tree gods are gonna slap you?
the problem with the lean-to is it only provides one base of protection and if wind changes direction it leaves you exposed and it deflects heat not the best shelter to use but in a worst case it will do for a short time
These are both pretty cool shelters I can’t wait to try them then when I go camping this summer
I can’t wait to try this at scout camp.
good ideas but you need more room and heat and all of theses ideas are open not closed areas but still cool
Actually, you want it to be tight and little space so that there is less room for you to heat.
cool
cool it gives so much detail
awsome
this is good info for me and others should read this to before they go in scouts
I like this.
The leave version is great if there’s nothing but leaves. Another one that the egales do at boy scouts is they take a tarp, lie it flat, put a sleeping bag over it, and throw the tarp over them. Its almost like 2 blankets. 🙂
great advise
Thanks! I have to teach a lesson to scouts on survival shelters. This really helped! I want to try the cocoon method.
but ud have to worry about bugs like ticks and with dry bark you might find termites
Who cares about ticks, you should have tweezers in your first-aid kit. And if you don’t have them, remove them when you get back to civilization.
WOW THANKS FOR THAT GREAT INFO NOW I WILL NOW WHAT TO DO IF THATT HAPPENDS TO ME
Yikes!
What if the tick has lyme disease and you get infected?
great advice
rocks (lean in)
good advise
Cool, I’ll be using the tarp technique for wilderness survival.
i am going to try all of them!
cool shelter
Nice
thanks