How to Make Your Own Hiking Stick
Walking sticks make hiking more fun. Also called hiking poles or hiking staffs, they let your arms get into the act, so you cover ground more easily. Even better, they help you keep your balance, which means that heavy pack will stay on your back instead of tumbling down some deep ravine — and maybe taking you with it! Here’s how to create your own walking stick or hiking pole.
WHAT YOU’LL NEED:
- A straight tree or tree branch that’s 1-1⁄2 to 2 inches thick at its big end, and 55 to 65 inches long (DO NOT CUT ANY TREE; see Step 1.)
- A 1-inch-long piece of 3⁄4-inch diameter copper water pipe
- Five-minute epoxy glue
- A small saw to trim the stick to its final length
- A sharp pocketknife
- A spokeshave and a wood-burning tool (both optional)
- Adult help and/or supervision
WHAT YOU’LL DO:
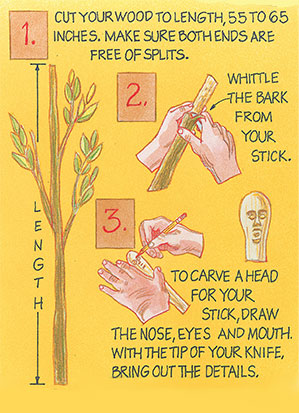 Step 1: Cut your wood to length, making sure both ends are free of splits.
You can use dead, dry wood, but it’s hard to carve and makes a weak walking stick. If possible, use fresh wood; hardwood from deciduous (leafy) trees is better than evergreen softwood because it is less gummy.
To choose the right size, stand with your arms at your side and the stick should be about 6 or 8 inches taller than your elbow. Pick an even longer stick if you’ll be tackling steep terrain. If you’re really just planning on walking with your stick, a shorter one will do.
Note: Scouts never cut just any live tree! Take wood only from approved sources, such as a conservation project that thins out a timber stand or trail-building and trail-improvement projects.
Step 2: Using your pocketknife, whittle the bark from your stick, revealing the bright wood beneath. This job takes patience, especially when you are working around knots. Keep at it. You may discover your stick has an inner layer of bark, as well. Carve it away too, or your stick will darken as it dries.
Step 3: Now is the time to carve a head for your stick, if you want one. Using a pencil, draw on the nose, eyes and mouth, then slowly and carefully use the tip of your knife to bring out the details. If you rush this part of your work, you risk slipping and cutting yourself.
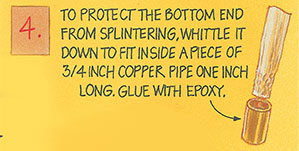 Step 4: To protect the bottom end of your walking stick from splintering, whittle it down until the piece of copper pipe slips snugly onto it. Secure the pipe permanently with five-minute epoxy.
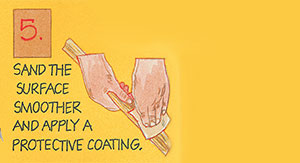 Step 5: Your walking stick is now ready for immediate use. However, if you’d like to carve it to a smoother finish and apply a protective coat, you’ll need to let it dry indoors for about a month. Use sandpaper or a spokeshave (if you have one) to make its surface even smoother.
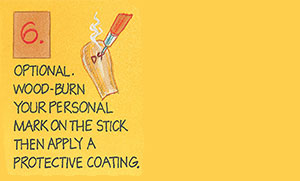 Step 6: Optional: Add your personal mark to the walking stick using a wood-burning tool. When you have the stick carved to your satisfaction, apply a stain or other such finish and a protective coat of polyurethane.
Take your walking stick with you on all your hikes. Whenever you pick it up, the stick will remind you of your past outdoor adventures and make you wonder what excitement lies ahead.
Leave a Comment