How to make a camera-phone stabilizer
To take great smartphone photos, you need to hold your phone steady. This simple, easy-to-build smartphone stabilizer is one way to make sure your cellphone photos and videos will be shake-free.
WHAT YOU’LL NEED
- 1″ x 2″ hardwood block (at least 6″ long)
- Crosscut saw (and ripsaw if you need to cut with the grain)
- Sandpaper
- 1/4″-20 T-nut x 7/16″ long (spiked or flat)
- 1/4″-20 bolt and nut (1/2″ to 1 1/2″ in length)
- Pencil
- 5-minute epoxy
- Q-tips
- Polyurethane paint (optional)
- 1″ x 16″ Velcro one-wrap strap
- Scissors
- Strong string about 6′ long
- Tape
- Drill
- 3/4″ spade bit
- 5/16″ drill bit
- Utility knife or pocketknife
- Hammer
9 tips for taking better smartphone photos
WHAT YOU’LL DO
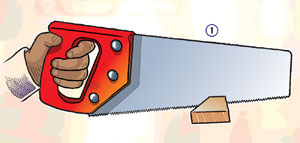 1. Cut the block to 6″ and sand until smooth.
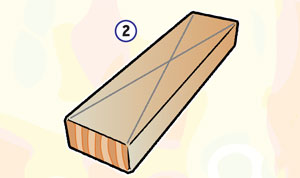 2. Find the center of the wood block by making an X from corner to corner.
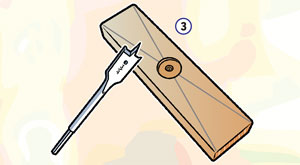 3. Using the spade bit, drill a small depression in the center as deep as the flat surface of the T-nut. The T-nut, when properly inserted, should be flush with the surface of the wood.
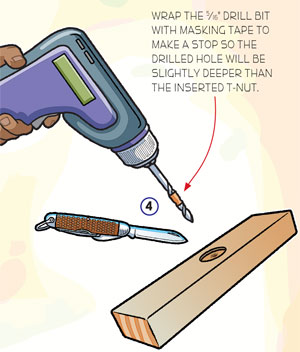 4. Wrap the 5/16″ drill bit with masking tape to make a stop so the drilled hole will be slightly deeper than the inserted T-nut. Using a utility knife or pocketknife, round the top edge of the hole you just drilled. This will accommodate the slight taper on the bottom of the T-nut. Sand off your pencil marks. With sandpaper, roughen the outside and bottom of the T-nut to increase adhesion. Mix the epoxy.
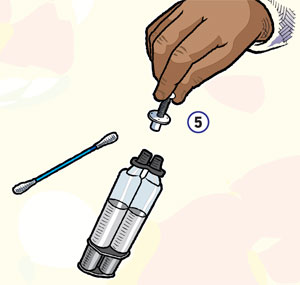 5. Hold the T-nut by inserting the bolt. Apply the epoxy to the outside and bottom of the T-nut with the Q-tip. Do not get any epoxy inside the threaded part of the T-nut.
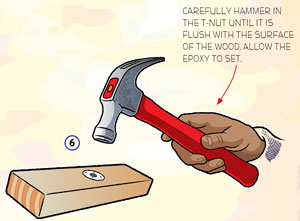 6. Carefully insert the T-nut into the drilled hole and remove the bolt. Gently tap the T-nut in with a hammer until the T-nut is flush with the surface of the wood.
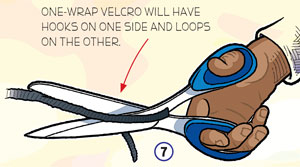 7. Cut the 1″ x 16″ Velcro strap the entire length so you have two 1/2″ x 16″ pieces.
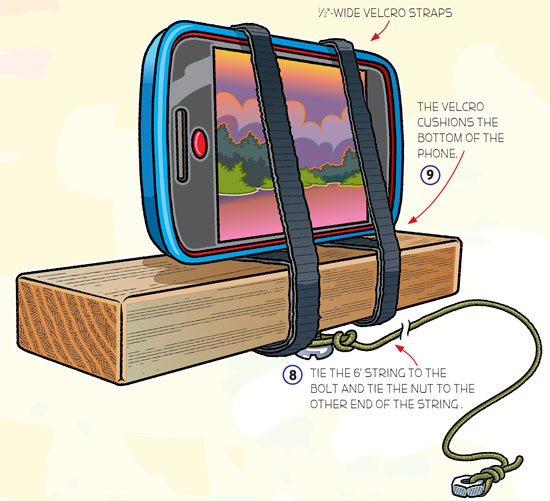
8. Tie the string to the bolt and tie the nut to the other end of the string. Screw in the bolt.
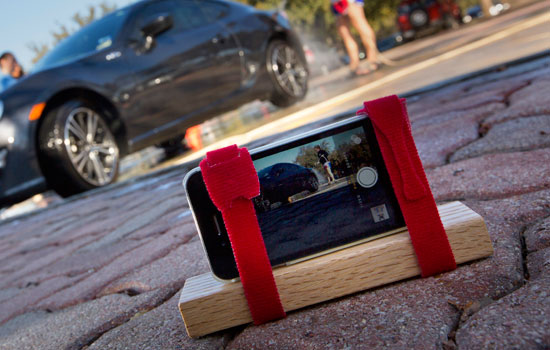
9. Attach the phone with the Velcro, and your stabilizer is complete.
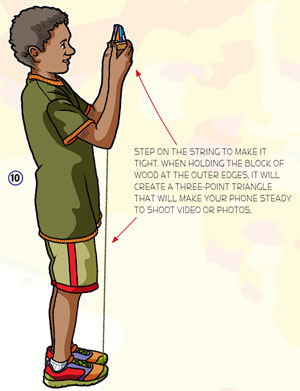 10. Step on the string to make it tight. This will make your phone steady to shoot video or photos. This phone system will also screw onto a traditional tripod.
asome
kool but can you adjust it up or down?
Why not just use the T bolt the way it is intended to be used? Drill clear through and insert it from the top. No need for any epoxy that way.
Looks really complicated
Nice
I don’t have a smart phone, but this is pretty cool.
It would work with a traditional camera as well if you didn’t have a traditional tripod.