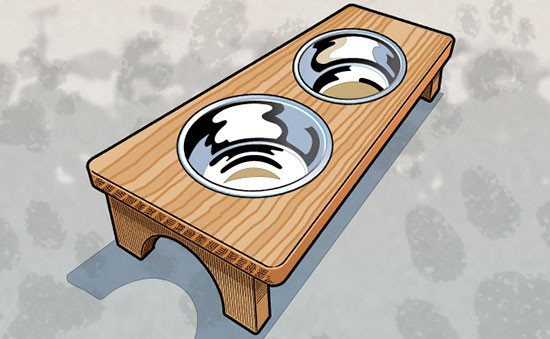
How to Build a Pet-Bowl Stand
This raised stand provides a comfortable place for your dog or cat to eat and drink.
WHAT YOU’LL NEED
- Dogs and cats are different sizes. You will need enough 1″ lumber to build your bowl stand the right width, height and length for your pet and your pet’s bowls.
- Two pet bowls with lips
- Tape measure
- Pencil
- Carpenter’s square
- Crosscut saw
- Ripsaw
- Keyhole saw
- Drill
- 1/2″ spade bit (to start the keyhole saw)
- Small bit (for drilling screw pilot holes)
- 4 corner brackets that will fit between the bowls and the inside of the legs
- 8 3/4″ wood screws (Sometimes the screws come with the brackets.)
- Wood glue
- Sandpaper
- Wood sealer
WHAT YOU’LL DO
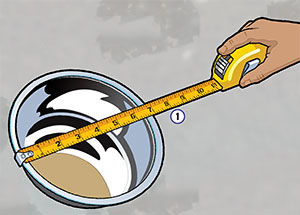 1. Measure the diameter of your bowls and get enough lumber for the top and legs. Measuring from the outside lip of the bowls, there should be at least 2″ on each side, 3″ on each end and 2″ between the two bowls.
Decide how high you need your stand to be based on the size of your pet.
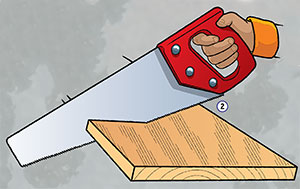 2. Saw the legs to the proper length. The legs can be as wide as the top or sawn narrower so the top overhangs the legs as shown. Make a straight cut, using the square.
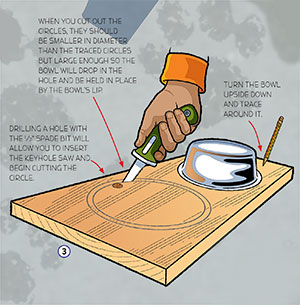 3. Turn the bowls over and arrange them on the top board in the proper places. With the pencil, trace around the bowls. This will give you an idea of how large the hole should be and how long the top should be. Cut the top to the correct length.
Drill a 1/2″ hole to start the keyhole saw for the round cuts. When you cut out the circles, they should be smaller in diameter than the traced circles but large enough so the bowl will drop in the hole and be held in place by the bowl’s lip.
Use the bowls to trace the simple design on the legs. Cut the leg circles out. Sand the legs and top. When sanding, round all the corners smooth.
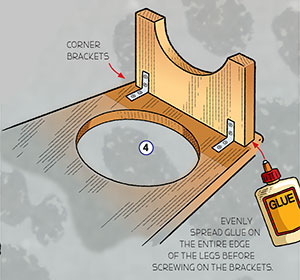 4. Using the corner brackets, glue and screw the legs to the bottom of the top board. Use the drill and the proper sized bit to drill starter holes for the screws. This will keep the wood from splitting. You can mark the depth of the drilled holes with tape to make sure you don’t drill the screw holes too deep.
After you glue and screw on the legs with the corner brackets, apply several coats of wood sealer. After the wood sealer dries, drop in the bowls, and your raised pet bowl stand is complete.
PHOTOS OF COMPLETED PROJECT
Check out these photos of the completed project sent to us by Scout Life readers. If you have a photos of a SL Workshop project, please use the form below to send them to us.

Perfect!! Thank you!
Worked great
very nice project
yaa very creative and useful
Very good project
I agree. Very cool. 🙂