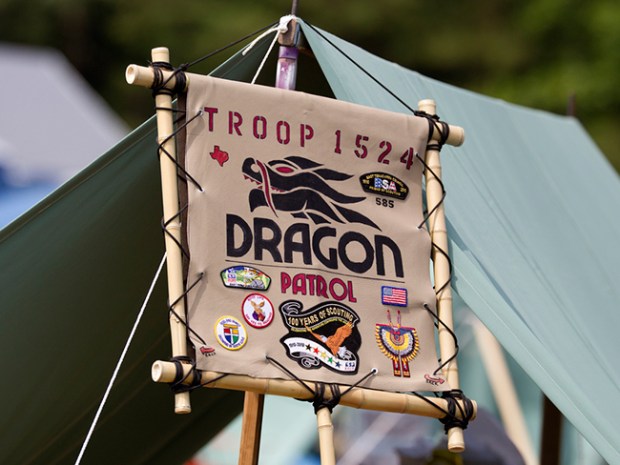
Make a Leather Flag for Your Patrol or Den
Show off your knot-tying skills with this flag for your patrol, den, pack or troop.
WHAT YOU’LL NEED
- Two 8′ long wooden poles (You can use poles that are 1 1⁄4″ to 2″ in diameter)
- 2′ x 2′ square of leather
- 40′ of paracord (There are many colors to choose from)
- Iron-on letters (You can also get iron-on sheets, if you want to cut out a design for your flag)
- Measuring tape
- Handsaw
- Coping saw
- Eight galvanized finishing nails
- Wood glue
- Hammer
- Sandpaper
- Grommet kit with 32 grommets
- Hole punch
- Pocketknife
- Disposable lighter
- Ruler
- Iron
- Four eye screws
- Drill and drill bit
WHAT YOU’LL DO
Step 1: Saw four poles 40″ long, and sand the ends smooth. Use the coping saw to cut two notches at the ends of two of the poles. Cut small notches along the length of each pole to keep the paracord from slipping. Glue and nail the frame together.
Step 2: Cut four lengths of paracord 40″ long. (Whenever you cut the paracord, always melt the ends so the cord doesn’t unravel.)
Step 3: Follow the diagram and tightly lash each corner of the frame. Punch holes around the leather square where the grommets will be. The holes should be 1″ from the edge. Hammer a grommet into each hole.
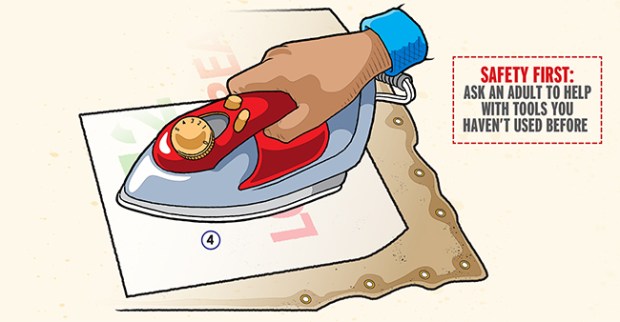
Step 4: Position the letters and design, if you have one, on the leather square. Use the ruler to make sure the letters are straight. Cover the letters with cloth or paper and adhere them with a hot dry iron. After the letters are stuck to the leather, cover them with paper and iron them for another 30 seconds, just to make sure they are permanently attached.
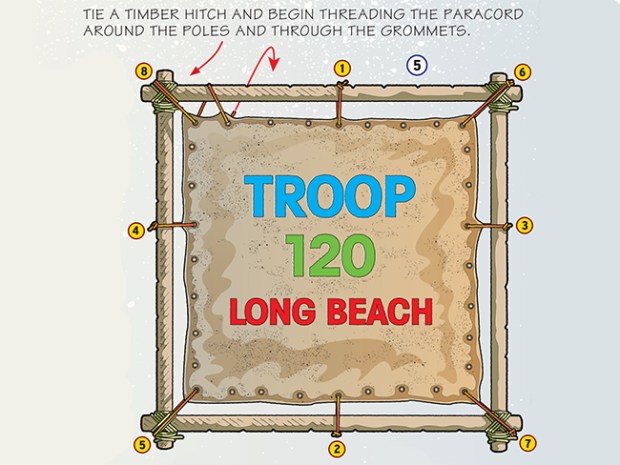
Step 5: Center the leather in the frame by tying it in place with short pieces of paracord. Do this in the order shown. The last corner is attached with the end of the long piece of paracord that will be used to thread the flag in place. Tie a timber hitch in the upper left corner of the frame and wind the long length of paracord around the square. When you reach the short pieces of paracord, untie them and take them off. Continue winding the paracord, keeping it tight and the flag centered. When you reach the upper left corner, finish off with a clove hitch.

Step 6: Drill pilot holes and screw in the four eye screws. Your leather troop flag is complete and ready for display.
SEND US PHOTOS OF YOUR FLAG
Super cool idea! And about the strength for an 11 yo boy…there are other people in the troop, even adults, that he could utilize to make those grommets happen 😉 just part of the process.
Does an 11-year old boy really have enough strength in his hands to install grommets in canvas?
Way better then what our boys used to make RR patrol flags. Will use this method next year.
I found these ideas very helpful