Make a Pencil Holder From Household Materials
What You’ll Need:
- Used 28-oz. empty food can (or larger).
- The can shown here is 4 1⁄2″ tall x 4″ wide.
- Brown paper bags (The number you’ll need depends on the size of the bags and the can.)
- Round pencil, longer than the can is tall
- Several colors of water-based paint
- Paintbrush
- Scissors
- Hot glue gun
- Wood glue
- Rope or twine
- Ruler (for measuring paper bag)
What You’ll Do:
Step 1: Wash the inside of the can. Do not remove the paper label. Put the can aside until it’s completely dry. Cut open a paper bag and lay it flat on a table. Cut a sheet from the paper bag about 1″ longer than the can is tall and 8″ wide.
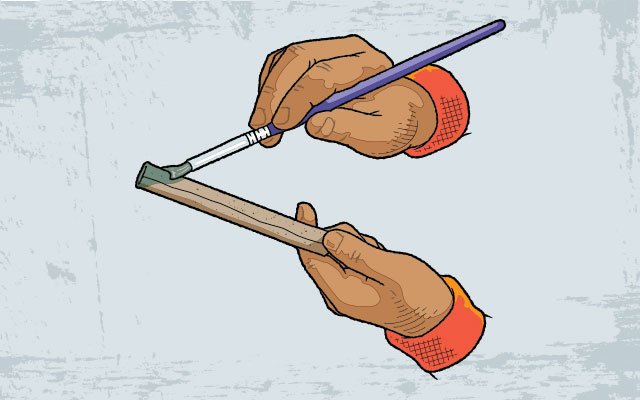
Step 2: Lay the pencil near the end of the paper, and tightly roll the paper around the pencil.
Step 3: Put some wood glue on the very end of the paper and finish rolling the tube. Slide the paper tube off the pencil. Make about 32 paper tubes.
Step 4: When the tubes are dry, use the scissors to cut each tube 1⁄4″ longer than the can is tall.
Step 5: Dilute the water-based paints so they become thinner and coat all the tubes. Don’t dilute the paint too much. Slowly add water to a small amount of paint. Test how it looks on a scrap of paper bag before you paint a tube.
Use as many colors as you want. Set them aside to dry.
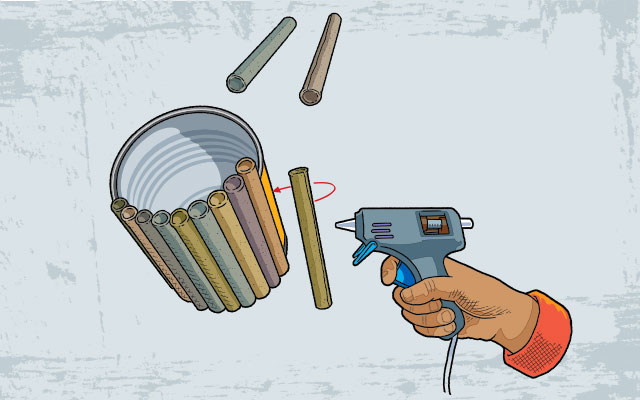
Step 6: With the hot glue gun, apply a line of glue to the seam of the first tube and stick it on the can. The tube should be placed vertically as straight as possible. Continue to glue the tubes around the can until you have covered the entire can. Dilute some wood glue with water, and apply two coats on all the tubes. Poke some glue in the cracks between the paper tubes.
Step 7: Once the diluted glue is dry, use the hot glue gun to attach one end of the rope or twine to a tube, and wrap several turns around the pencil holder as shown. Glue the other end of the rope to a tube below where you started. Make two rings of rope as shown. Fill the pencil holder, and your project is complete.
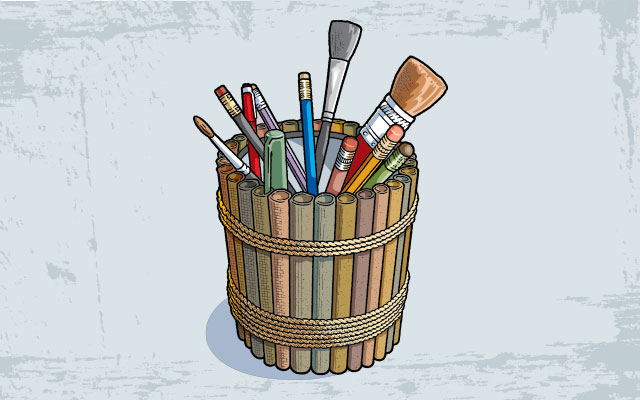
PHOTOS OF COMPLETED PROJECT
Check out these photos of the completed project sent to us by Boys’ Life readers. If you have a photos of a BL Workshop project, please use the form below to send them to us.


Nice one
Pls show me your designs
Good
Excellent idea. Thanks.
Really Cool
to hard for me