How to Cook With a Reflector Oven
Dutch ovens might be as essential to Scout cooking as the gooey-delicious cobblers they create, but you’d have to be crazy to lug one of these 20-pound lead weights on a long backpacking trip.
Fear not. It’s still possible to get homemade baked goodies — including pizza, breaded chicken, blueberry pie and fresh-from-the-oven chocolate chip cookies — even when you’re camping miles away from the troop trailer.
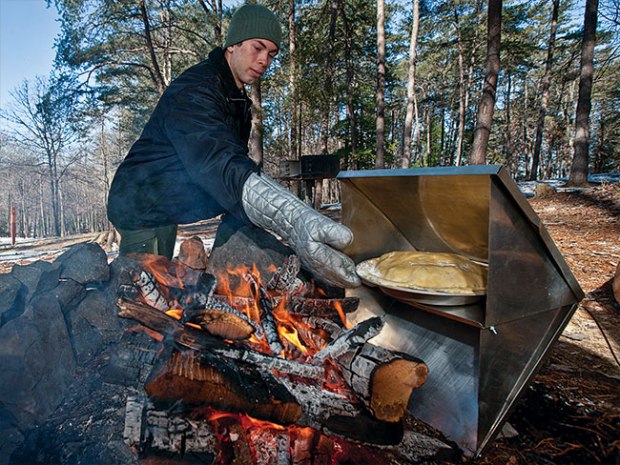
Typically weighing just a pound or two, a reflector oven is an effective alternative. The oven looks like a square box cut diagonally in half with a shelf in the middle to hold the food. Unassembled and stored in a pouch, it’s about the size of a one-subject notebook.
Complete ovens sell for about $60 online, where you can also find plans for making ovens of different shapes and sizes from scratch using some lightweight metal flashing, a few rods and a handful of rod pins.

The radiant energy from a roaring campfire travels into the oven, hits the oven’s angled top and bottom and bounces toward the food on the shelf, where the food absorbs the energy and bakes. The oven works best set a few inches from a fire.
“It can be challenging to make sure the oven stays level and that it’s close enough to the fire so the food in the back gets cooked but not so close that the food in the front gets burned,” says Eagle Scout Michael Milazzo from Troop 1570 in Herndon, Va. “Reflector ovens are unconventional, but they’re fun to use, fun to get other campers’ reactions, too, and it’s really great to have them available as an option.”
There is a right time and place for everything, including reflector ovens.
“They are great to use on a cold day or when you’re making a giant fire for a campfire ceremony,” says Brandon Timbrook, a Life Scout with Troop 1570. “All you need is a roaring fire and you’re ready to bake.”
By their very nature, reflector ovens aren’t for every camp-out. A ban on ground fires will keep it packed away. Charcoal briquettes and propane gas won’t work with it either. Reflector ovens need the radiant heat of strong flames from a wood fire.
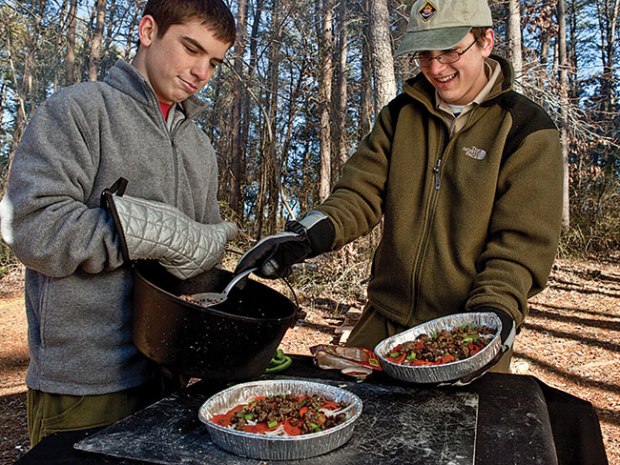
Here are some of the dishes that Troop 1570 can create with its reflector oven.
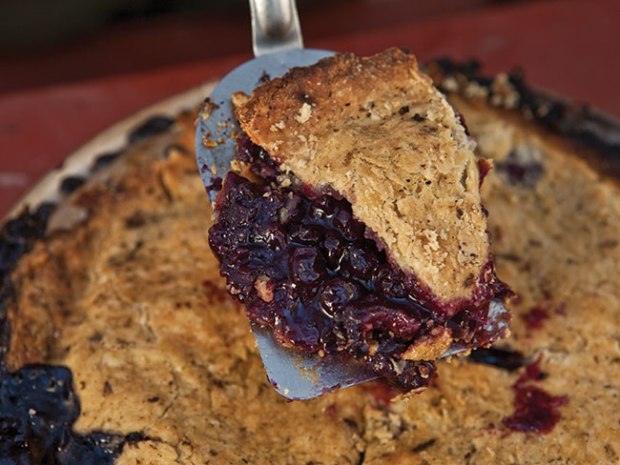
BERRY PIE
- 2 cups flour
- 1 teaspoon salt
- 2⁄3 cup plus 2 tablespoons shortening
- 5 tablespoons water
- 5 to 6 cups berries
- 4 tablespoons flour
- 1 cup brown sugar
- 1⁄2 teaspoon salt
- 2 tablespoons butter
Place flour and salt into bowl. Mix in shortening thoroughly. Sprinkle in the water one tablespoon at a time, mixing until flour is moistened and the dough almost cleans the side of the bowl. Gather dough into a ball and divide it in half. Shape one half of the dough into a flattened round and layer between two sheets of floured wax paper. Roll out the paper-covered dough until it is two inches larger than an inverted pie pan. Gently remove one sheet of wax paper. Ease dough into pie pan dough-side down, and peel off second sheet of wax paper. Repeat with second half of dough, but instead of placing into pan, set aside.
Stir together four tablespoons flour, brown sugar and salt for the filling. Pour over berries in a bowl and toss gently to mix. Pour berry mixture into the pie pan and dot with the butter. Carefully cover with the dough for the top crust. Pinch the edges of dough all the way around the pie to seal, then cut slits in the top to allow the steam to escape.
Place on center shelf with oven close to high flames. Carefully turn pie every 15 minutes or so to encourage even baking. Remove when crust is brown. Allow pie to cool before serving.
BROWNIES
- 1 cup sugar
- ½ cup shortening
- 2 eggs
- ½ cup flour
- 2 squares melted baking chocolate
- ½ teaspoon vanilla
- Pinch of salt
Mix ingredients well and pour into greased 8-inch square pan. Bake until knife inserted into brownies comes out clean.
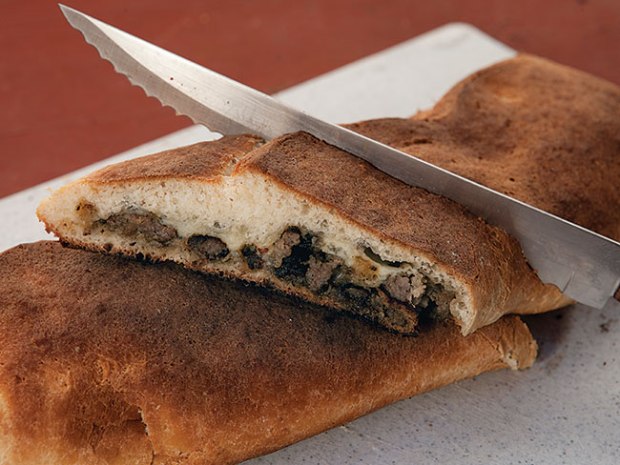
SAUSAGE BREAD
- 1 lb. ground sausage
- 1⁄2 cup shredded mozzarella cheese
- 1 can “Ready to Bake” bread dough or Pillsbury
- Pizza Crust
Cook the sausage until it’s crumbled; drain. Spread out the dough. Spread the sausage and cheese over the dough. Roll it up; seal it. Bake for about 15 to 18 minutes until the bread is fully cooked. (NOTE: A full loaf might be too big for a reflector oven. Consider cutting finished loaf in half to make two smaller loaves.)
BISCUITS
- 3 cups flour
- 6 tablespoons baking powder
- ½ teaspoon salt
- 6 tablespoons oil
- 1 cup milk
Mix ingredients well. Roll out flat on a flour-covered surface. Cut out biscuits and bake until browned and stiff, and knife blade inserted into biscuits comes out clean.
PAN PIZZA
- 1 can “Ready to Bake” pizza crust
- 1 jar pizza sauce
- 1 cup shredded mozzarella cheese
- Toppings, such as Italian sausage, sliced pepperoni, green pepper, onion, mushrooms
Divide pizza crust and place into two 9-inch cake pans. Spread crusts with pizza sauce. Top with cheese. Add desired toppings. Bake approximately 15 to 20 minutes, until crust edge is golden brown.
CHOCOLATE CHOCOLATE-CHIP COOKIES
- 2½ cups flour
- ½ teaspoon baking soda
- ¼ teaspoon salt
- ½ cup unsweetened cocoa powder
- 1 cup dark brown sugar, packed
- ¾ cup white sugar
- 1 cup butter, softened
- 3 eggs
- 2 teaspoons vanilla
- 2 cups (12 ounces) semisweet chocolate chips
Combine flour, baking soda, salt, cocoa powder and mix well. In separate bowl, blend sugars well then add butter and beat to form grainy paste. Add eggs, vanilla then beat until light. Add flour mixture, chocolate chips then blend until just combined. Drop by spoonfuls onto ungreased cookie sheet. Bake until knife blade inserted into cookie comes out clean.
CARDIAPPLE ARREST (Baked Apples and Bananas)
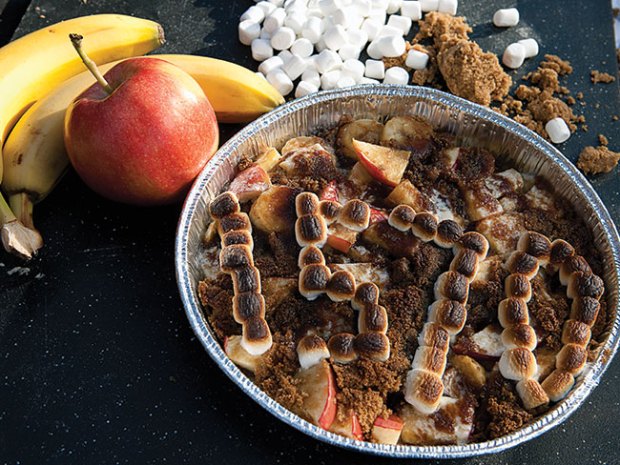
- 4 apples
- 4 bananas
- 3⁄4 cup brown sugar
- 1 teaspoon cinnamon
- 1⁄2 stick butter
- 1 cup mini marshmallows (optional)
Slice apples and bananas and place in cake pan. Spread brown sugar and cinnamon evenly over fruit. Place pats of butter on top of the brown sugar. Bake approximately 15 minutes. If desired, top with marshmallows and bake until melted and brown on top.
PINEAPPLE UPSIDE-DOWN CAKE
- 3 eggs
- 1 teaspoon baking powder
- 1 cup sugar
- 1/3 teaspoon salt
- ½ cup pineapple juice
- 4-8 slices pineapple
- 1 teaspoon vanilla
- 4-8 maraschino cherries
- 1 cup flour
- ½ cup brown sugar
Grease the baking pan. Arrange pineapple rings to cover bottom of the pan. Place a cherry in ring hole of each pineapple ring. Sprinkle brown sugar evenly over the pineapples. Mix well the sugar, flour, baking powder, salt, then add the eggs, pineapple juice and vanilla. Beat until the batter is smooth. Pour the batter evenly over the pineapple rings and brown sugar. Bake until a toothpick comes out clean. Invert onto a cutting board.
BREAD
- 1/8 cup warm water
- 1 tablespoon sugar
- 1 package yeast
- 1 ¼ teaspoons salt
- 1 cup milk
- 2 ¾ to 3 ¼ cups flour
- 1 tablespoon butter
Pour the warm water over the yeast in a bowl. Heat the milk to the same temperature as the water (about 105 degrees). Add the warm milk, butter, sugar, salt, and 2 cups of the flour. Beat vigorously for at least 1 minute to make a thick, rough lumpy, pasty batter, not stiff enough to hold its shape. Stir in enough of the remaining flour, ½ cup at a time, to make stiff but not dry dough. It should take all but about ½ cup of the flour. Dust a cutting board and knead the dough for a minute or two, then let it set for 10 minutes to absorb moisture. Then knead for 6-10 minutes more until you have a smooth ball. Grease a bowl and place dough in it, making sure the dough is greased all around. Cover and let rise until doubled, an hour or two. Then grease the baking pan. Punch the dough down and knead for a minute or so to get the air out of it. Then spread the dough evenly in the baking pan. Bake for 45-50 minutes.
CHOCOLATE POUND CAKE
- Vegetable oil for pan
- Flour for pan
- 1 package devil’s food or chocolate fudge cake mix
- 1 package chocolate instant pudding mix
- 4 eggs
- 1 cup sour cream
- ½ cup warm water
- ½ cup vegetable oil
Coat pan with vegetable oil, then dust with flour. Shake out excess flour, then set pan aside. Blend cake mix, pudding mix, eggs, sour cream, water, and oil. Beat well. The batter should look thick and well combined. Pour the batter into the pan and smooth over the top. Bake for 45 to 50 minutes. The cake should pull away from the sides of the pan and should spring back when lightly pressed. A toothpick should come out clean. Cool 20 minutes before removing. Then loosen with a knife and remove by inverting onto a plate.
Do you have the plans for the reflective oven. I would like to make one for my next trip to the BWCA in September.
I have the very reflector oven in the article. Very easy to assemble and the Bungee Dealee Bob from old scout keeps everything nice and together!
Oops I’m Fred not Fredy. Sorry
Plans used to be in the 1960-70 era field books. Just buy one.
I would like to see the plans for making a reflector oven from the August 1972 Boys’ Life Article.
that was a really cool article
Love how easy this is to put together…one-pot meals are the best! This would be great for starving college students learning to cook.
It was a beneficial experience for me to go through your webpage. It definitely stretches the limits with the mind when you go through helpful advice and make an effort to interpret it accurately. I am going to review this web site frequently on my PC. Thanks for sharing
Our troop makes reflector ovens in late October, for the November Camp-out our troop goes on, since the November Camp-out is a no cooking camp-out.
tried the Cardiapple arrest and the sausage pie. they were real good.
sandy
I made a reflector oven in 1972 from plans in Boys Life (Aug 1972)and still use it today camping. I love it.
I love this idea. I think the recipes are great and I can’t wait to try them with the Venture Crew.
Good Idea, but I’d prefer that all of the recipes offered wouldn’t clog your arteries.
The 1967 Fieldbook has plans for a reflector oven. I remember using one to earn cooking merit badge about 1970.
! ! ! ! ! ! ! ! ! i love the idea ! ! ! ! ! ! ! ! !
sounds like a great idea guys!
Iv used them to make cake and stuff but its hard to control the heat and the flames im making one tommorow!!!
same thing here Almost1stclass!
very neat recipes have to try them!
look good and sound good
I had never heard of a reflector oven before. But now I think I’ll just have to start saving. This looks really cool.
What creative scouts these boys are! Recipes sound and look super delicious!!!!!