Learn how to remove an attached tick
Q: Any suggestions for removing a tick?
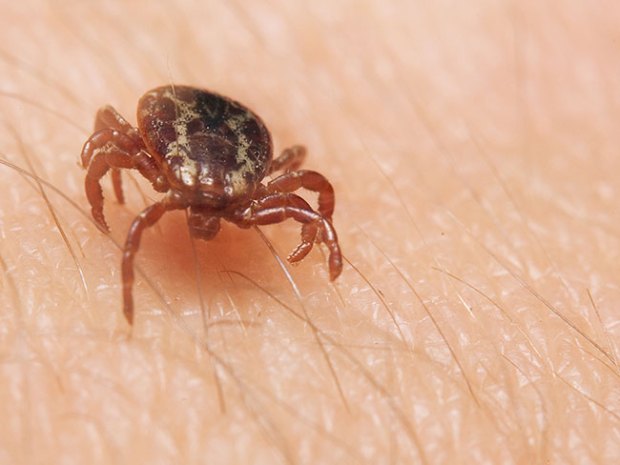
A: Let’s face it: Ticks are no fun. You might even say, “They really bite!” The mouthparts on these little critters are barbed, so once they get a good bite, they are tough to remove. Some ticks even secrete a cement-like material that helps them to adhere to the skin better. Now, that’s a sticky situation!
Laboratory studies have shown that in Lyme disease, for example, the longer a tick is attached to the skin, the greater the risk of transmission of the disease. The good news is that some ticks can be on human skin for 1 to 2 hours before attachment even takes place. For this reason, close and regular inspection of ALL BODY PARTS should be performed when traveling in tick-infested areas.
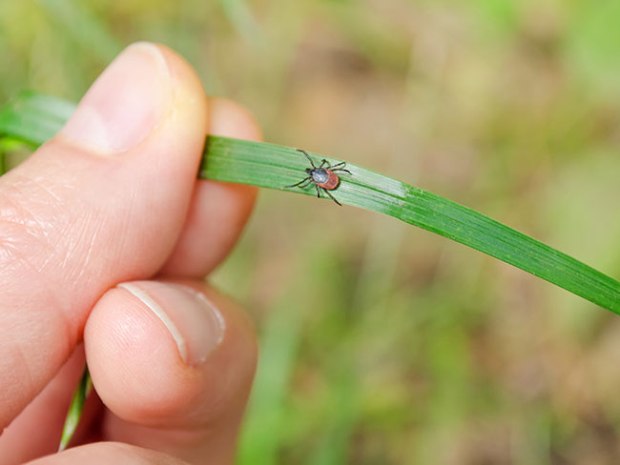
Protective clothing (for example, long pants cinched at the ankles or tucked into boots or socks) is also helpful for keeping ticks off your skin. Spraying clothes with an insect repellent may also provide some additional protection. Any loose ticks can be removed with duct tape or the edge of a credit card.
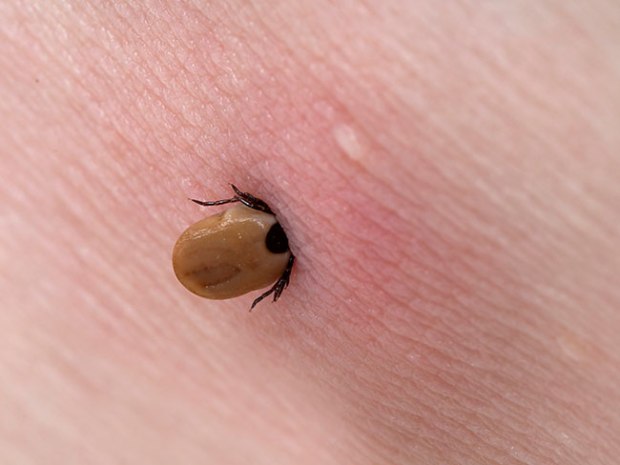
If you find an attached tick, however, get ready to remove it as soon as possible. Why the sense of urgency? Because quick and correct removal of attached ticks — ideally, within 24 hours of attachment! — can greatly reduce the likelihood of disease transmission from tick to human.
Know that improper removal of a tick can lead to a “host” of problems (blood-sucking joke fully intended!). You see, any tick parts left behind in the skin can lead to a foreign body reaction in which your body’s own immune system revs up and tries to fight off the intruding tick parts. The problem, here, is that the inflammation that follows can allow for infections to set-in more easily.
How to remove an attached tick safely, directly, and effectively
1. Always start by washing your hands.
2. “Glove-up” if possible. Don’t worry, though, because you will not be touching the tick directly. Doing so might allow the tick to bite you — duh!
3. Get a quality pair of fine-tipped forceps. Don’t waste your money on expensive tick-removal kits. A good pair of forceps does an excellent job and comes in handy for other medical emergencies, as well.
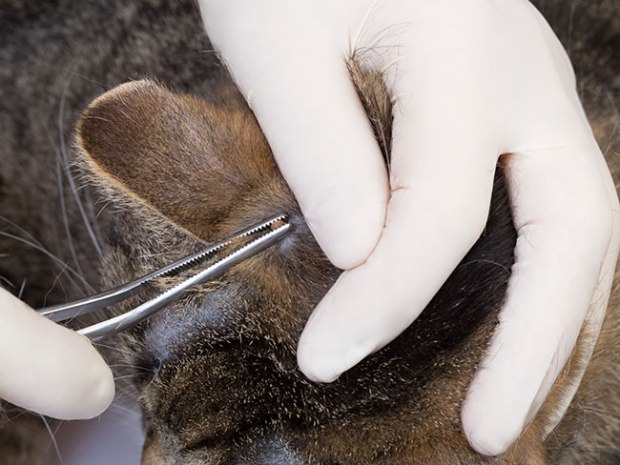
4. With your forceps, grab the attached tick as close to the skin (i.e., as far up on the tick’s head) as possible.
5. Gently pull the tick out counter to the direction that the mouth parts entered the skin. In other words, back the tick out in reverse! Use a steady, constant motion, and move in a straight line, being careful not to twist, jerk, or turn the forceps. Also, be careful not to squeeze the tick’s body too much because doing so might squeeze tick guts and contents all over the area. Yuck!
6. Once you remove it, consider saving the tick in a sealable container for identification purposes.
7. Next, cleanse the skin with an antiseptic or soap and water. You can also apply an antibiotic ointment if you have one.
8. Wash your hands and go about the rest of your day.
Avoid using “home remedy” methods of tick removal, such as rubbing fingernail polish or vaseline petrolatum, using rubbing alcohol, or applying a hot extinguished match directly to the tick. In general, these methods do not result in tick detachment. More importantly, some of these methods may actually induce the tick to salivate (drool!) or regurgitate (puke!) into the wound. Double yuck!
Wash your hands with soap and warm water after dealing with a tick. If you develop a rash or flulike symptoms or otherwise feel ill in days or weeks after being bitten by a tick, talk to your doctor.
Now, get out there and remove some ticks!
Leave a Comment