How to Build a Little Free Library
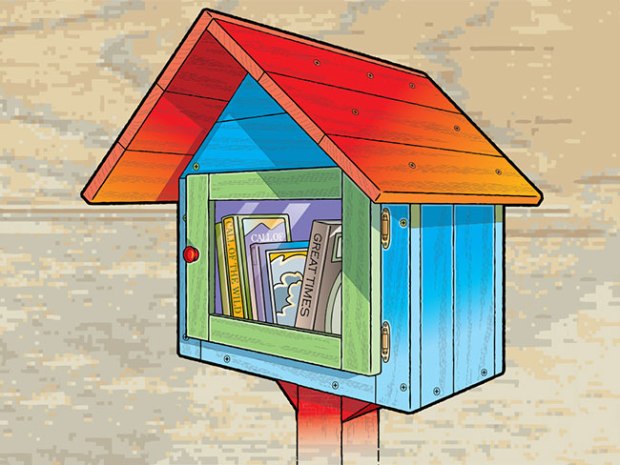
Use recycled materials to make a neighborhood library where people can borrow, return and/or donate books. Visit littlefreelibrary.org to learn how to set up and run your Little Free Library.
WHAT YOU’LL NEED
- An unfinished pine frame with an inside measurement of 8″ x 10″. This will become the door.
- Pallets, or old discarded fencing or wood. This will make up the walls, roof and floor. The wood should be the same thickness, no less than 3⁄4″. Don’t use old wood that has been painted. (Old paint might contain lead and is a health hazard.) To take apart pallet wood, you will need work gloves, safety goggles, a flat pry bar, a claw hammer and a crowbar for stubborn nails.
- 2″ x 2″ x 11″ board for the roof cleat
- Pocketknife
- Exterior wood glue
- Pipe clamps, for gluing the recycled boards together
- Two self-closing overlay hinges
- Cabinet knob
- A sheet of clear acrylic, large enough to be cut to fit into the groove in the back of the frame
- Very fine-toothed saw (or utility knife if your acrylic is thin)
- If your wood is 3⁄4″ thick, you will need 60 1 1⁄4″ exterior wood screws.
- Drill and drill bits for predrilling lag bolts and screws
- Crosscut saw and ripsaw
- 1⁄4″ drill bit for vent holes
- Sandpaper
- Exterior paint
WHAT YOU’LL DO
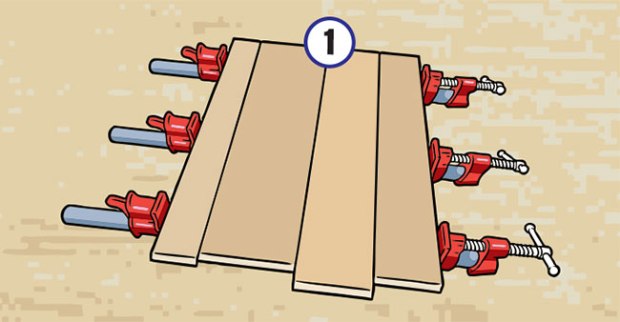
1. Collect more than enough boards to build the library, because some of the recycled wood will not be usable. Choose the cleanest wood from your pile. Remove any nails and cut off any unusable wood.
Cut the remaining boards to a rough length. The boards should not be too long when gluing and clamping them together. Sand all the edges and any rough spots.
Choose several boards close to the same length. Apply a thin layer of glue to all the edges and clamp them tightly together as shown. Allow each panel to dry overnight. Clamp and glue together enough panels to make all the parts of the library.
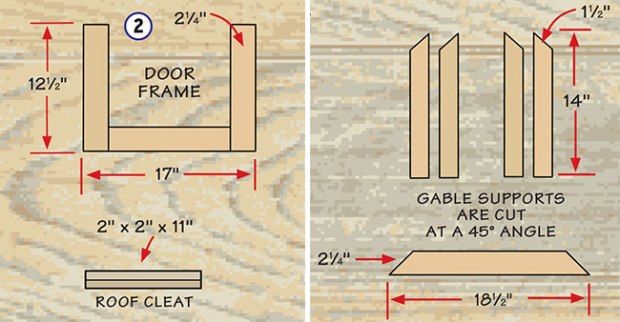
2. Use the drawings as a guide to cut to size the door frame, gable end supports and roof cleat.
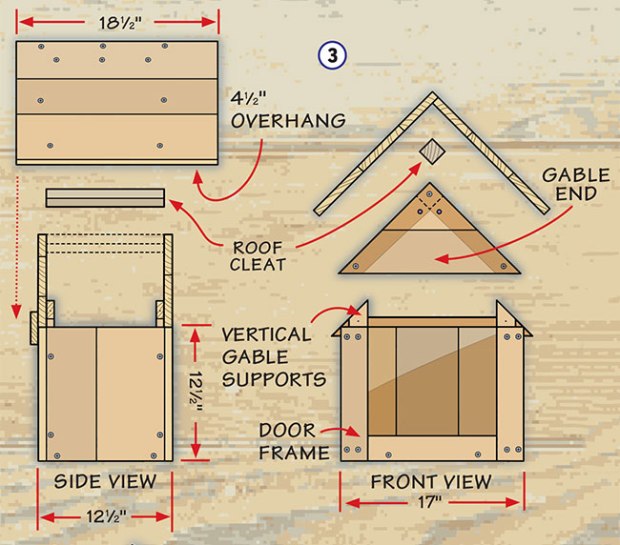
3. Use the drawings as a guide to cut to size the roof, walls, floor and gable end sections. Glue and screw the walls, floor, door frame and gable end supports together.
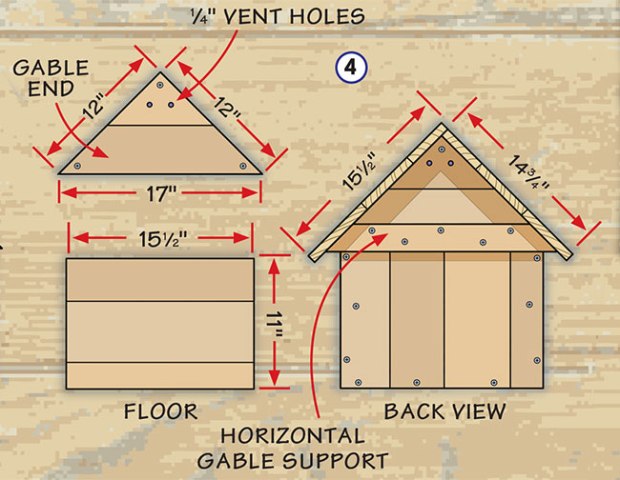
4. Glue and screw the gable ends to the supports. Screw the roof cleat to the inside of the gable ends. Glue and screw the roof in place. Drill two 1⁄4″ holes at the top of each gable end for ventilation.
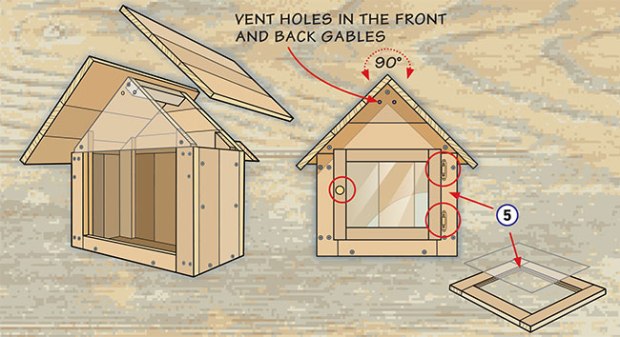
5. Cut and fasten the acrylic window inside the door. Hinge the door to the door frame, and screw on the cabinet knob.
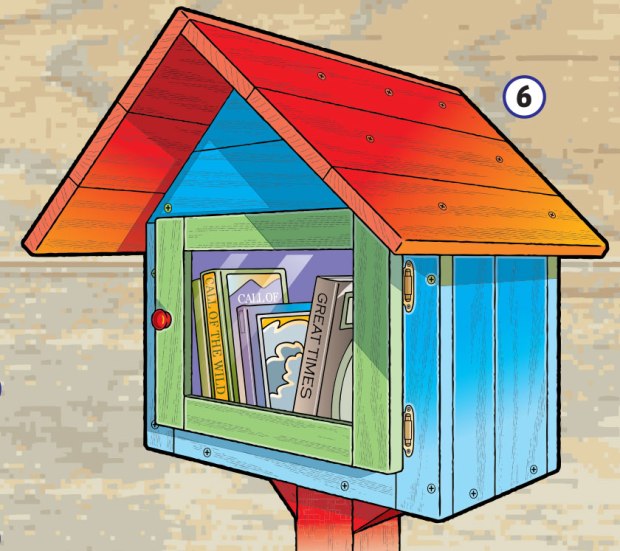
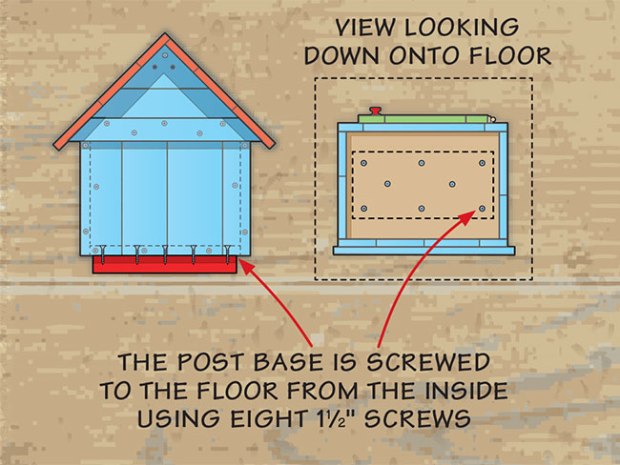
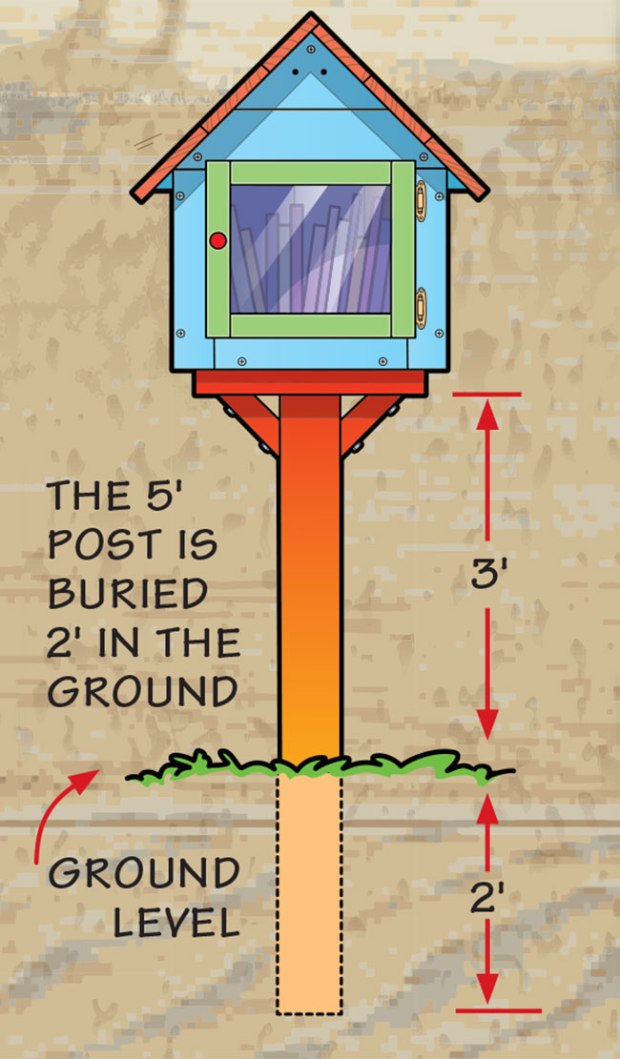
6. Paint the library any colors you wish. Mount your library on a post (4″ x 4″ x 5′) buried 2′ in the ground. Fill it with books, and your library is complete.
POST ASSEMBLY
WHAT YOU’LL NEED
- 4″ x 4″ x 5′ fence post
- Two 2″ x 4″ x 6″ boards
- 2″ x 8″ x 14″ board
- 8 1 1/2″ exterior wood screws
- 8 3/8″ x 3″ galvanized lag bolts

PHOTOS OF COMPLETED PROJECT
Check out these photos of the completed project sent to us by Scout Life readers. If you have a photos of a SL Workshop project, please use the form below to send them to us.


Leave a Comment