How to Tie-Dye a Shirt in 4 Easy Steps
Create the perfect summer T-shirt with this easy step-by-step guide.
WHAT YOU’LL NEED TO MAKE A TIE-DYE T-SHIRT
- A white T-shirt
- A tie-dye set (includes dye, gloves and rubber bands)
- A tarp or plastic sheet to keep your mess contained
- Gallon-sized plastic zip-top bag
WHAT YOU’LL DO
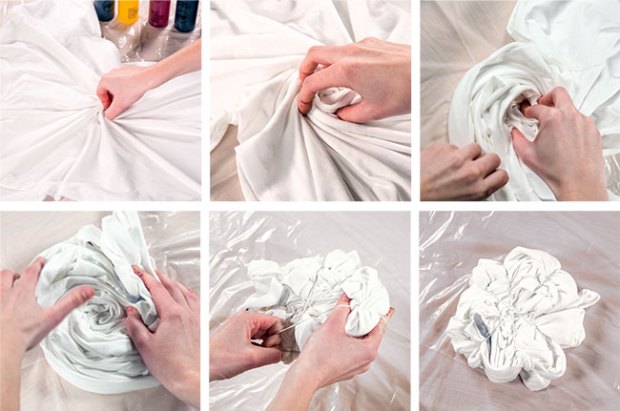
1. Tie It: Lay out the shirt on a flat surface. Pinch the middle with one hand and twist until the shirt makes a tight spiral shape. Use four rubber bands to segment the shirt into eight sections — like a pizza.
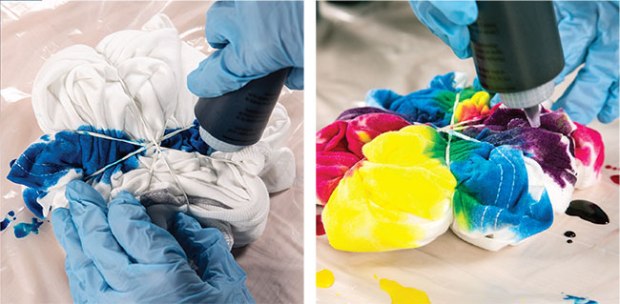
2. Dye It: Select the colors of dye you want to use. Put on the gloves. Add water to the prefilled bottles of dye and shake to mix them up. Squeeze each of the dye bottles onto the sections; each section should be a different color from the one next to it. Turn the shirt over and repeat the process on the back.
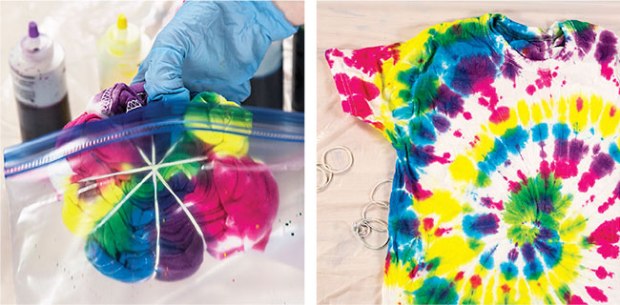
3. Dry It: When you’re finished dyeing, put the shirt in the zip-top bag and close it. Let it dry for up to 12 hours. Rinse the excess dye off the shirt with water, and then wash it by itself in the washing machine.
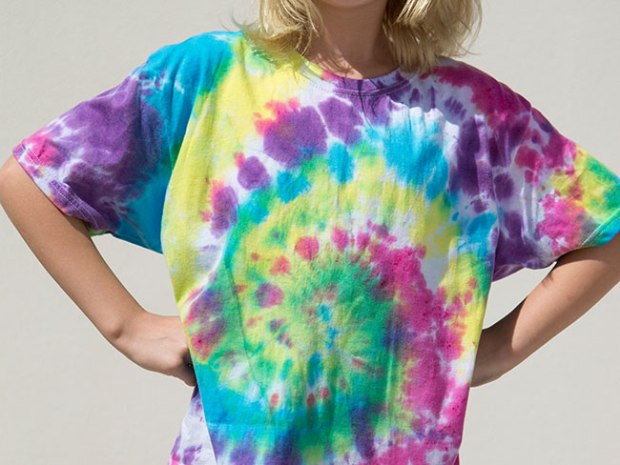
4. Wear It: Enjoy your perfect summer T-shirt, and don’t forget to send us a photo using the form below.
PHOTOS OF COMPLETED PROJECT
Check out these photos of completed T-shirts sent to us by Scout Life readers. If you have a photos of a SL Workshop project, please use the form below to send them to us.

OMG! it actually works! that is so cool! LETS DO THIS GIRLS!
So hi
I like the unicorn tie die shirts.