How to Make a Paper Tube Flashlight

Learn how electricity works — safely — by building this DIY flashlight.
WHAT YOU NEED TO BUILD A FLASHLIGHT
- 3-volt flashlight bulb
- Two D batteries
- Two 5-inch No. 22 insulated copper wires with at least 1/2-inch insulation stripped off ends
- Pocketknife, utility knife or wire strippers
- Scissors
- Tape (electrical, duct or masking tape will work)
- Small cup (paper or plastic)
- Two brass brads
- Jumbo paper clip
- 4-inch cardboard tube
- Cardboard square cut to fit bottom of cup
WHAT YOU’LL DO TO MAKE A FLASHLIGHT
STEP 1: Attach a brass brad to the end of each wire, securing them by wrapping the wires around the heads of the brads.
Use the utility knife to open two small holes in the paper tube. The holes should be 1 1/2 inches apart.
Push the brads (and wires) through the holes. Orient the wires so that one goes through the top of the tube and one goes through the bottom.
Tape the wires and brads to the inside of the tube.
STEP 2: Tape the D batteries together. Make sure they’re firmly in contact with each other, with the positive end of one touching the negative end of the other. Insert them in the paper tube.

STEP 3: Tape one wire to the negative (flat) end of the connected batteries.
STEP 4: Cut a small hole in the cardboard square, and then cut the square to fit the bottom of the cup. Place the remaining wire through the hole.
Twist the wire around the base of the bulb and insert the bulb into the cardboard.
Tape the cardboard with bulb to the tube. Be sure the end of the bulb is in contact with the top of the battery.
STEP 5: Cut a hole in the bottom of the paper cup just large enough for the bulb.

Place the bulb into the hole and secure the cup to the cardboard tube with tape.
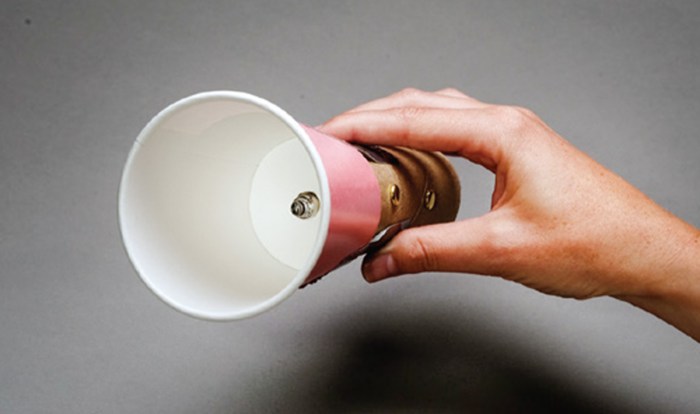
Wrap the cup and tube with more tape, covering both completely. Carefully wrap tape around the brads.

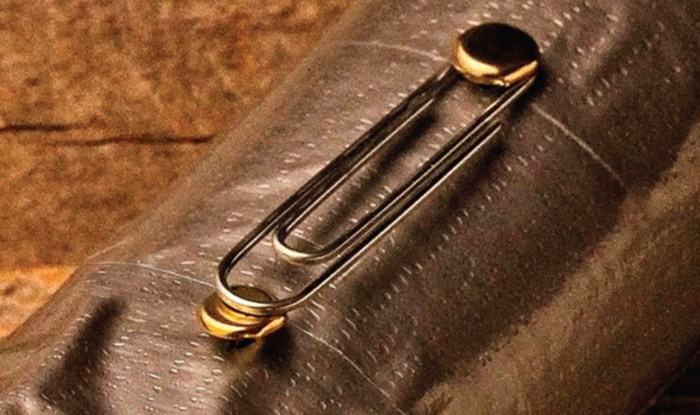
STEP 6: Place the paper clip between the two brads on the outside of the paper tube. This will act as your power switch. When the paper clip touches both brads, the flashlight turns on. When the paperclip is removed, the flashlight turns off.
I want to put it in practice. Help me God
i love this
Cool
he he school project go brrrrr
Nice I guess 😑
LOOKS GOOD
ooo i wanna try this 😀
What energy conversion is used here?
Did not work. 😠
Good one.
thank you! this was fun to do as a project and I learned a lot from it!
Cool.😐